Football/Soccer Session (Moderate): Setting up as a false 9 formation

Premier Users' Club
Stephen Fisher
Description
See the guidance at the top of this page to understand why you are not seeing interactive Football/Soccer images.
See the guidance at the top of this page to understand why you are not seeing interactive Football/Soccer images.
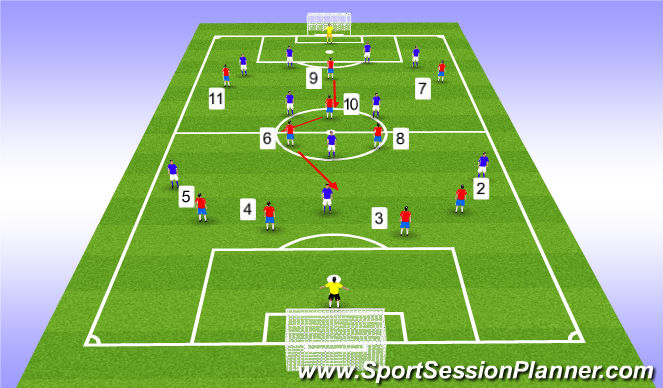
Change to BPO position.
This is how we change to our new BPO formation.
9 will drop back centrally between our midfield and the two wingers.
This will leave their 3& 4 with no one to mark - they will have to make a choice.
If they push an extra player into the midfield and play with a back 3, it will create openings for us.
If they sit back it will leave us with a 4v3 overload in the midfield.
10 will drop back opposite 8, with 6 to drop centrally in front of 3 & 4.

See the guidance at the top of this page to understand why you are not seeing interactive Football/Soccer images.
This is our "false 9" 1-4-3-1-2 formation
When we win the ball in midfield we still look to play to our wide players, 7 or 11, or an overlapping 2 or 5.
They may have to hold up play to create an angle if support is not in position.
7 and 11 can take on a player 1v1, but only if there is space behind the player. If 3 or 4 is covering behind, look to draw the opposition players over to that side and then quickly switch play.
Try to islolate the opposite winger 1v1 with a quick switch.
If nothing is on maintain possesion - do not play into traffic.
Remember it is OK to play backwards to maintain possesion, change the angle of attack and reload again.
See the guidance at the top of this page to understand why you are not seeing interactive Football/Soccer images.
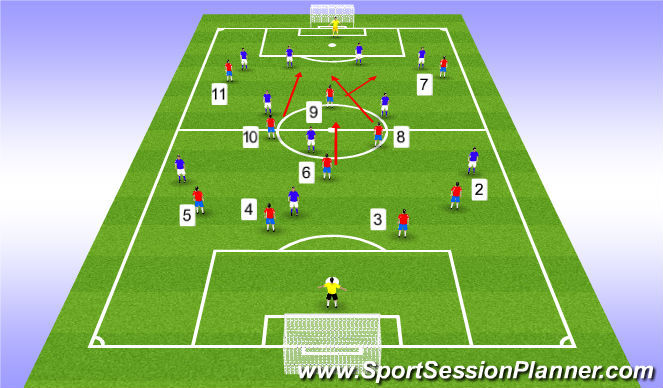
When we win the ball in midfield. Transition from BPO>BP
In transition 9 to make a diagonal run forward - 3 or 4 will have to track that run.
10 to make a run into space, 8 to run diagonally to the top of the box for a cut back.
6 to hold and not overcommit, so we have cover in transition if we loose the ball.
Back 4 to push to the half way line.
7 & 11 look to cut back to hit either of these 3 players, or cut in drive to goals if 3 & 4 caught out of position.

 Play animation
 Play step-by-step
 Repeat (toggle)
 Full Screen
 Pause
Pause Stop
Stop
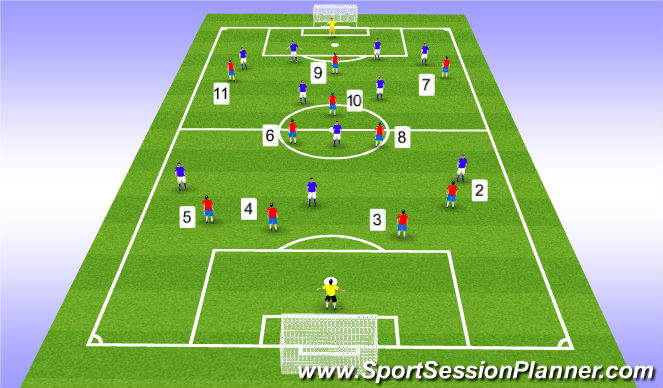
Apapting our current formation to a "false 9"
This is our current 1-4-3-3 formation.
What we are aiming is to provide better midfield cover for long balls, and create a 4v3 overload in midfield.
This will make it easier to win the ball and retain possesion in midfield.
It will mean an increased workload on the 9 & 10, as in transition they will have to cover
more ground.
This should decrease the possiblility of the opposition 10 getting between our lines, as we always have the 6 to cover.